Wednesday, October 20, 2010

Shots and Gum

All I have to do is look at a shot and I am as nervous as I was when I was a child in the doctors office.
The shot that we gave the Easley Painting today will make it better.
We used a needle to inject more glue into the rip on the painting. Then, we forced the rip edges flat by pressing them.
Then, we dealt with a surprise: gum!
Someone had stuck gum to the back of the painting while it hung in the library. It blended into the canvas color. We noticed the gum when we were transporting the painting and it stuck to something!
After glue and gum, we were back to color matching

and paint application.

We can now see the progress from when we first put the patch onto the back...


until now.
Things are looking good, and we are on our way to being done with this restoration.

Wednesday, October 13, 2010

Re-touching the Painting

Here is the Easley Painting now that we have done a little work on it. We will still be spending some time putting more layers of paint on certain places, but the painting is coming along very nicely.
I'll tell you about what we have done since the last blog.

Here you can see the patch that is now on the back of the painting. After several days, the glue on the patch was dry enough to begin work on the painting front.

Here is the painting front. The rip edges came together very nicely. There is some discoloration, but this is normal.

You can see a closeup of the rip.

Here I am carefully cleaning the painting.Jan is a color matching genious: she mixed colors to match the paint on the portrait.

Our mixed paint was applied to the scar left by the rip.


Here you see first a picture of the rip without paint.

Here you see a picture of the rip with the first layer of paint.


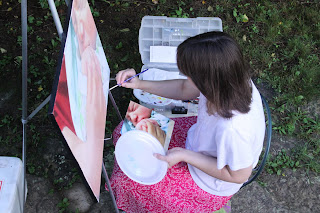
Here I am covering areas rubbed by the painting's frame.

After the first layer of paint.

Edge before paint.

Edge after paint.


There will be more paint applications over these same areas, once the paint has dried. Another area that can use our attention is the varnish. As you can see from this close up, the varnish has flaked off in large areas. This gives the painting a splotchy appearance. This often happens over time and will be easily fixed with a thin layer of varnish.

Thursday, October 7, 2010

Repairing the Painting

To make a patch, Jan and I cut a small square of canvas and pulled out the strings along its edge.
Then, Jan used a paint brush to apply a thin coat of rabbit glue to the back of the painting.

After this, our patch was placed over the hole.

At this point, we worked to lay the threads of the patch flat before the glue could dry.

Finnaly, we placed a piece of wax paper over the patch and put a pile of books on top of it, to ensure that it would dry flat.

A Painting to Repair

Walter Shrower, Art Department Head at Bluefield College, has asked me to repair a painting of Mr. Easley for the college library. This repair was lovingly requested by an Easley family member.
The painting has a rip in it.

I wrap the painting to keep it protected, then, I cross the college campas with it. I'll take it to Jan's house and she will work with me to repair it.

Monday, September 6, 2010

Pictures

Here is Don Elmes taking pictures of my painting at the Appalachian Art Center. He uses a special flash to help him get the details just right. This time, I asked him to take pictures of the painting in the frame and out of the frame because of the project I am working on.

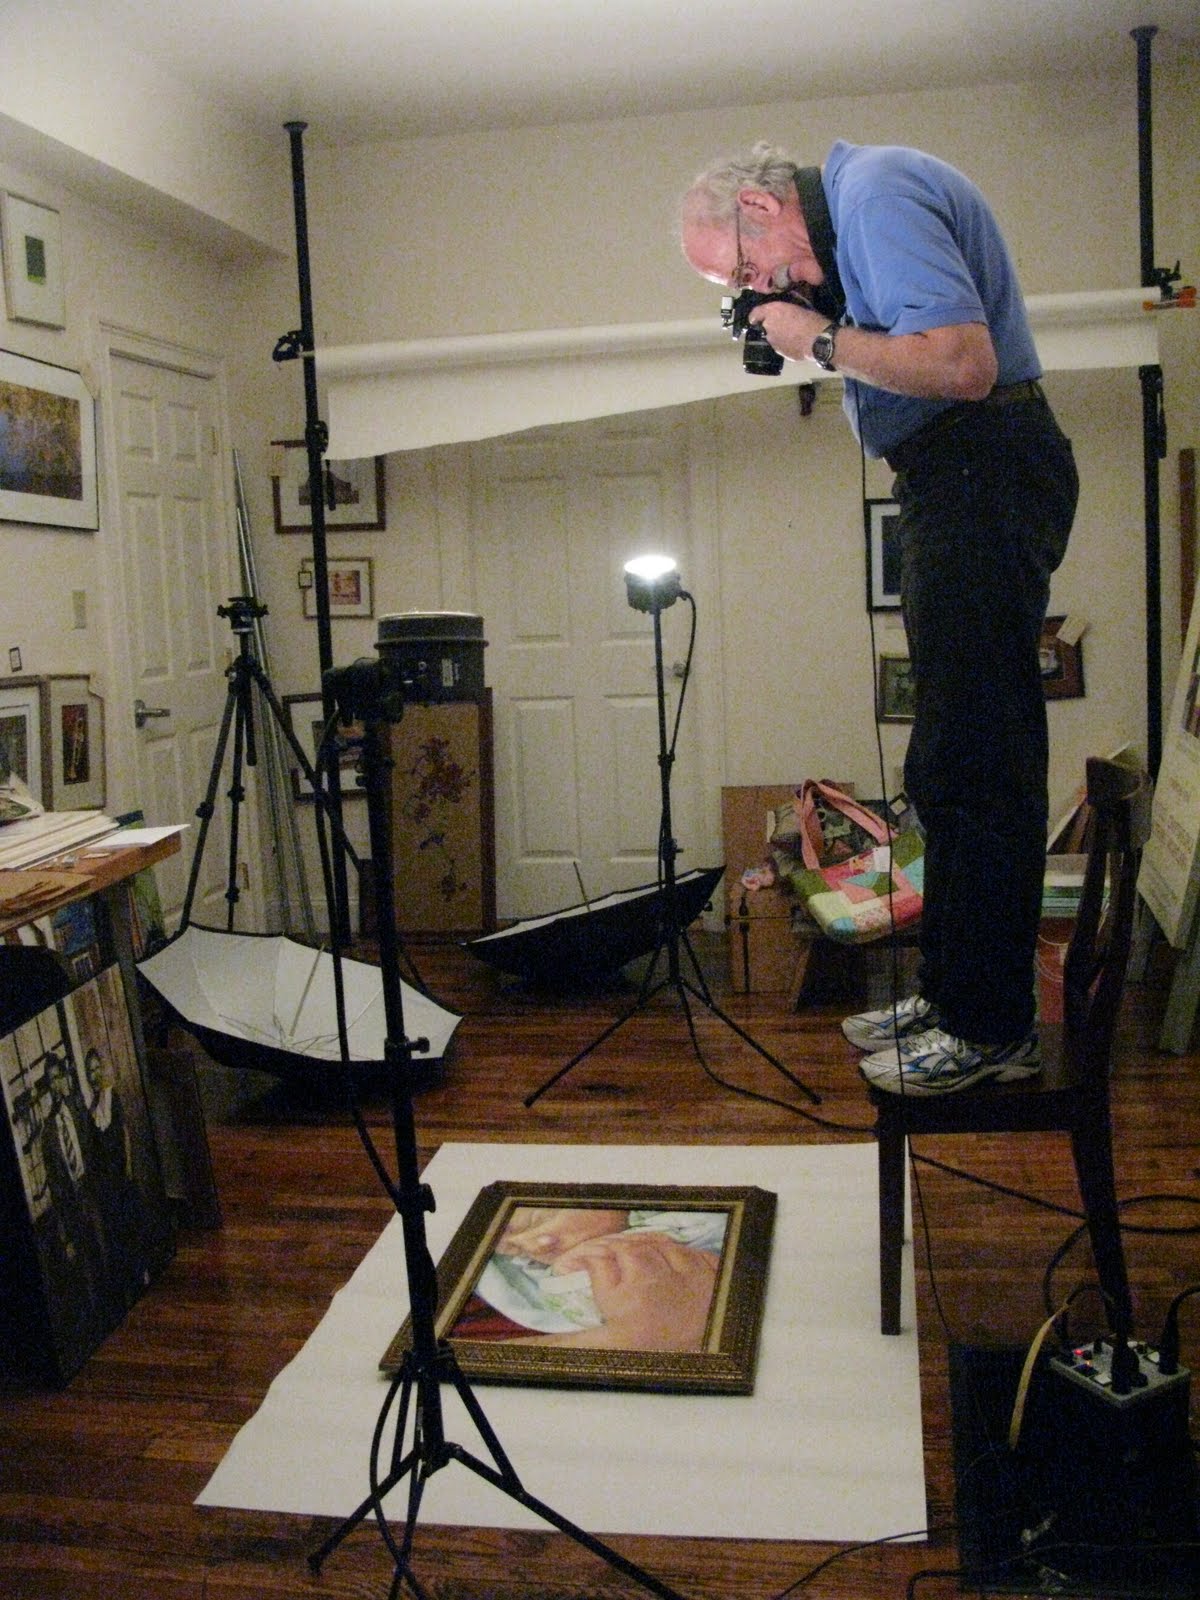
After he takes pictures, he crops them and touches them up on the computer. Now, the photos will look just like the painting.

Apalachain Art Center

Lately, the Appalachian Art Center has been photographing my paintings. In exchange for this service, I have been helping to paint the new signs that will advertise this gallery.
The signes have been made into small sections. All the small sections will be joined together later when they are installed outside the art center.
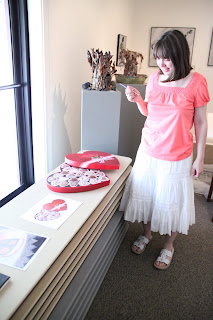
Here I am standing next to my chocolate box painting and its new photograph. They do a realy good photography job here: their art pictures are very clear and well lit.

Prerogative Magazine

Here I am with editor of Prerogative Magazine. She is holding the magazine and I am holding my painting. It was really special to open this magazine and see a picture of myself and a picture of my painting inside. I cryed joy tears. I couldn't belfieve my eyes.

Tuesday, August 31, 2010

Baby Painting

I have a whole list of commissions to work my way through. This first one is for a women's magazine called "Prerogative." I was really excited when I received the invitation to be Prerogative's Feature Artist. I had been wanting to do a painting of my sister's children and this was the perfect opportunity.
I drew the picture onto my canvas and indicated every value. Then, I sprayed the drawing with fixative.
My painting went right over top of the drawing.

Before lending it to the magazine, I put the painting in the Chatauqua Art Festival and it won a ribbon. The painting had been completed in a month. I rushed so fast to finish the artwork that I was still painting my signature on the bottom as we were getting ready to carry it into the show!

Movin' On

Now that we had graduated, it was time to move out of our studio space at the college. This is were we used to work and display our art.

Friends, like Ben, helped.

The move was bitter-sweet because we were excited to be moving on, but we were sad to leave all the good times that we had been experiencing with our college friends.


The space looked so empty, now.
Next year, other artists will be working here.

Time for us to make more art in our new place.